Digital Closet OS 2027 Notion Template— How to Use Every Feature | Digital Closet Organizer & Outfit Planner
By HerYelle · Last updated on 2026-11-06
See the clothes first — fill Advanced fields later.
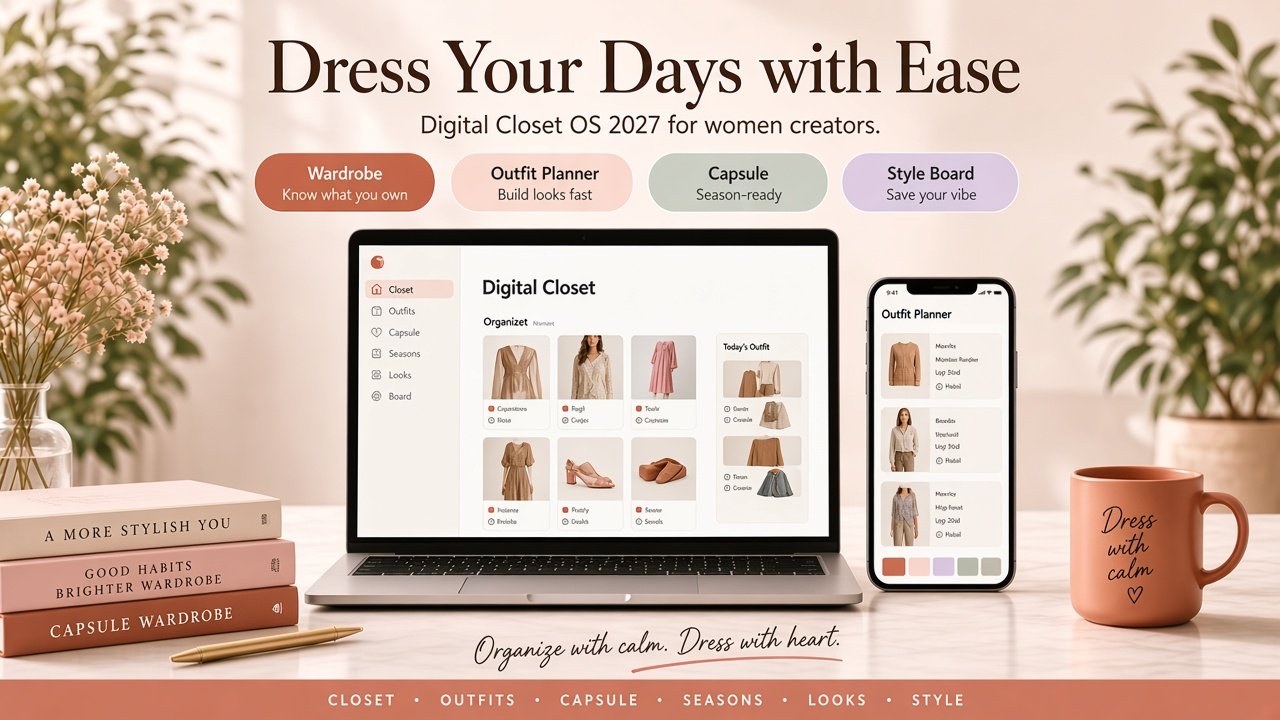
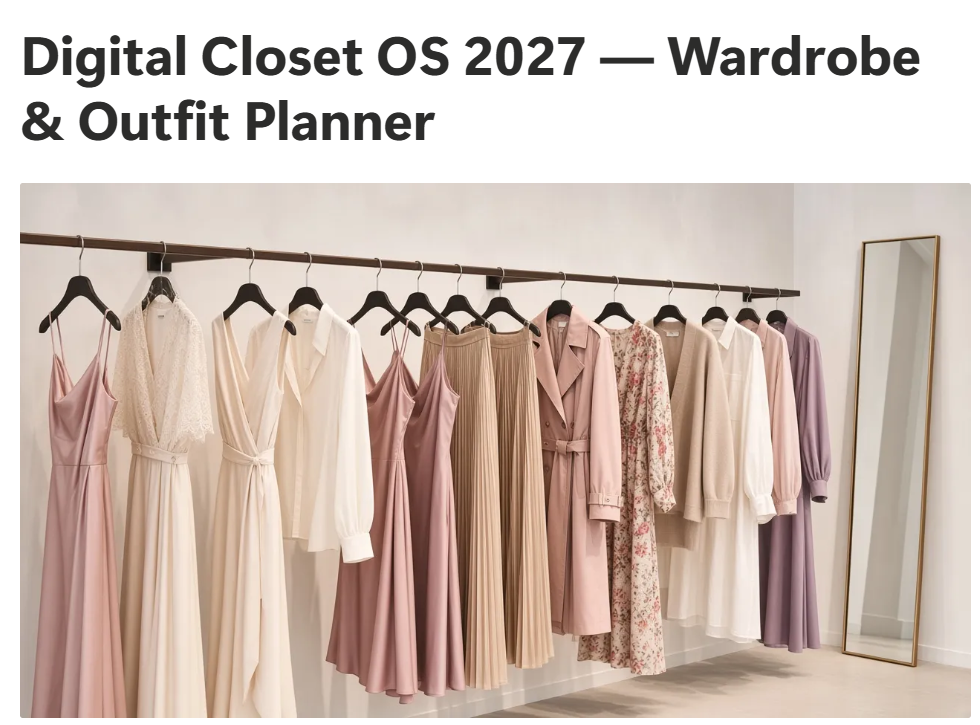
A complete, feature-by-feature usage guide for this Notion wardrobe template — Digital Closet OS 2027 — Wardrobe & Outfit Planner — a visual digital closet organizer and wardrobe tracker for Audience (Individualistic Woman & style-led professionals). Closet + Outfit photo galleries, cost-per-wear at a glance, calm weekly planning, care, refresh, travel, and wishlist — soft beige energy, not a spreadsheet vibe.
Who this guide is for
You duplicated this Notion wardrobe template (or are about to). You want mornings that feel styled — not scrambled — a closet you can see before a shoot, a meeting, or a quiet coffee day, and a calmer way to get your wardrobe under control. This guide walks every major module: what it is, when to open it, exact steps, properties that matter, views, tips, and common mistakes — matched to the real fields in your workspace.
This usage tutorial is for you if you are looking for:
- A visual digital closet and digital closet organizer with gallery cards driven by a Photo Files property (not empty spreadsheet rows)
- An outfit planner (Notion outfit planner) with Look cards, weekday boards, and a honest mark-as-worn → CPW loop — great for planning outfits
- A closet inventory / wardrobe tracker so you can see exactly what pieces of clothing you have
- Soft inventory habits: season filters, laundry tracker toggles, never-worn refresh signals, and a more intentional clothing wishlist
- A beginner-friendly Notion closet template you can duplicate — without the pain of building a page by yourself — that feels like a boutique window, not dashboard theater

Some seasons ask for more pieces. Most ask for clearer ones. Use only what serves this season.
Soft start — Day 0 wardrobe checklist
Before you customize every view, grab a calm Day 0 pass. You do not need every database filled on day one.
- Day 0 checklist (print or copy into Notes):
- Duplicate the hub → wait for databases to finish.
- Favorite Home so Navigate is one click away.
- Open Style Profile — pin 3–6 moodboard images + one palette.
- Add 10–20 pieces you actually wear (Name · Photo · Category · Season · Status).
- Plan 3 looks for this week (Photo + Weekday + Type = Planned).
- Leave Care / Refresh / Travel / Wishlist closed until next week unless you need them today.
- Demo persona Maya is sample data. Keep rows that teach the flow; replace the rest when ready.
Who it is for (and who it is not)
Built for:
- Female creators & mom creators who want a calm wardrobe OS — see the clothes first, not a spreadsheet dashboard
- Soft-life / personal-brand builders who dress for shoots, meetings, and quiet coffee days without a stylist on call
- Freelance creators & micro-founders who need Closet Inventory → Outfit Planner → weekly Look cards → soft CPW & refresh in one Duplicate
- Anyone looking for a Notion wardrobe template 2027 / digital closet organizer with Style Profile, Outfit Planner, laundry tracker, Closet Refresh, Travel Planner, and intentional Wishlist — personal-use and light
Not built for: retail closets running hundreds of SKUs, agencies styling 20 clients, or anyone who wants a red-metric “capsule challenge” scoreboard. This is a soft system you can keep.
What you get when you invest (potential upside)
Paying for the template is not buying “another aesthetic page.” It is buying a ready-to-duplicate wardrobe OS so you stop rebuilding folders every Sunday.
| If you struggle with… | You gain… |
|---|---|
| “I have clothes but nothing to wear” | One visual Closet Inventory — Photo · Category · Status · CPW on glanceable cards |
| Empty-morning outfit anxiety | Outfit Planner · Look cards · Weekday board · Occasions on one database |
| Not knowing what you already own | Closet Hub gallery so you can see exactly what’s in your closet |
| Weak / rushed OOTDs | Plan Photo + Items + Weather before you get dressed or film |
| “What should I buy next?” | Style Profile (Moodboard · Palette · Avoid prefs) + intentional clothing Wishlist |
| Laundry & repair chaos | In wash toggles · Garment Care Log without a second app |
| Guilt pieces hanging forever | Closet Refresh · Never worn · Donate? · Purge Tasks guided by CPW |
| Trip packing stress | Travel Planner · Packed status · day outfits linked to Closet |
Practical upside many buyers feel in the first 1–2 weeks: faster Day-0 setup (minutes, not a weekend of empty tables), fewer “what do I wear?” stalls, captions-ready looks before shoot day, laundry that doesn’t ghost your Ready rail, and a weekly ritual that fits a low-capacity morning — so getting your wardrobe under control becomes kind.
Some seasons ask for speed. Most ask for steadiness. Use only what serves this season.
How to obtain the template
Ready to use it in your workspace? After checkout on Heryelle / your listing, open the template hub → ··· → Duplicate into your Notion, then follow this guide in your copy. Personal-use license — organize your own wardrobe; do not resell the template.
Template hub: Digital Closet OS 2027 — Wardrobe & Outfit Planner
Duplicate first (··· → Duplicate), then follow along in your copy. Inside the template, the nested How to Use is your quick onboard; this page is the full feature guide.
Before you hit Duplicate, scroll to the footer on HerYelle and enter your email under Get the packs & reviews worth your time. Privacy-respecting; unsubscribe anytime.
Getting started — duplicate & Day 0
Your runway before the wardrobe becomes habit. Onboarding is Style Profile + a small Closet + three Look cards — skip modules if life is loud; the template waits.
Step-by-step
- Open the published hub → ··· (top right) → Duplicate.
- Choose your workspace. Wait until every database finishes copying (Closet, Outfits, Occasions, Wishlist, Style Board, Care Log, Purge Tasks, Trips, and linked views).
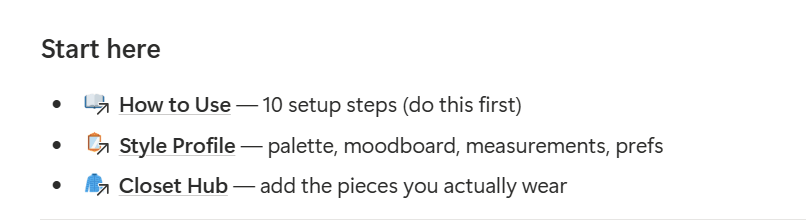
- Open How to Use (this guide) and skim Who / Soft start / Ritual.
- Open 🪞Style Profile — moodboard, palette, measurements, Avoid / Brand / Fabric / Style prefs.
- Optional: change the Home cover to something that feels like your closet.
- Clear Maya sample rows when you are ready — keep any Look cards that still teach the flow.
Tips
- Do not inventory every forgotten hanger on Day 0. Pieces you wear first.
- Personal-use license: organize your own life and business wardrobe; do not resell or redistribute the template as a product.
- Customizing gallery views before uploading Photos — you will rebuild them twice.
- Filling Advanced fields (Brand, Size, every Style tag) before the card has a Photo — density beats perfection.
- Keeping unused optional strips “just in case” — noise becomes guilt.
Weekly wardrobe ritual — how features work together
Open Home each planning day. Close the week with Style Journal + a light Closet Refresh glance. Everything else is optional seasoning.
Sunday evening / Monday morning (10–15 minutes)
- Open Home → skim Look cards and This week outfits.
- In Outfit Planner, set or adjust Weekday looks (Type = Planned / Saved look).
- Check In the wash — toggle pieces back to Ready if laundry is done.
- Optional: jot Weather / Temp on each day’s look (no live weather widgets — check your phone).
After you wear a look (2–3 minutes)
- Outfit Type → Worn + Comfort + Mood (feeds Style Journal).
- Open each linked Closet piece → manually +1 Times worn and update Last worn so CPW updates.
- If laundry starts → toggle In wash (and/or Status = In wash).
Monthly soft close
Open Closet Refresh: Never worn / Donate? / Declutter queue → one Purge Task. Skim Wishlist against Style Profile. Archive or restyle without drama.
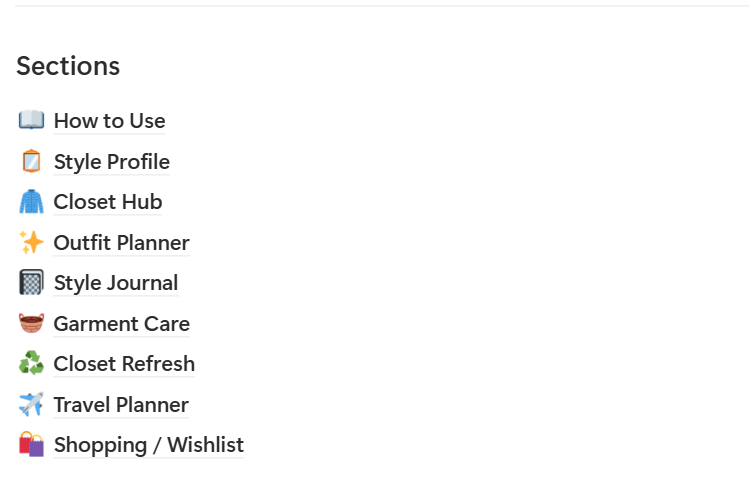
What you get — module map
| Module | Job | Open when… |
|---|---|---|
| Navigate | Synced brown bar on every hub page | You need any module in one click |
| Style Profile | Moodboard, palette, measurements, prefs | Day 0 and before any wishlist buy |
| Closet Hub | Visual closet inventory / wardrobe tracker + CPW + status | Adding pieces, laundry, seasonal sort |
| Outfit Planner | Outfit planner · Look cards + weekday board + occasions | Planning the week or saving a combo |
| Style Journal | Worn gallery · Comfort / Mood | After wears; weekly pattern glance |
| Garment Care | Care Log · wash / repair / special care | Laundry day or a button that needs love |
| Closet Refresh | Never worn · Donate? · Purge Tasks | Season change or closet feels heavy |
| Travel Planner | Trips + packing + day outfits | A trip is calling |
| Shopping / Wishlist | Why · Season · Priority · Worth it? | Before checkout, not after impulse |
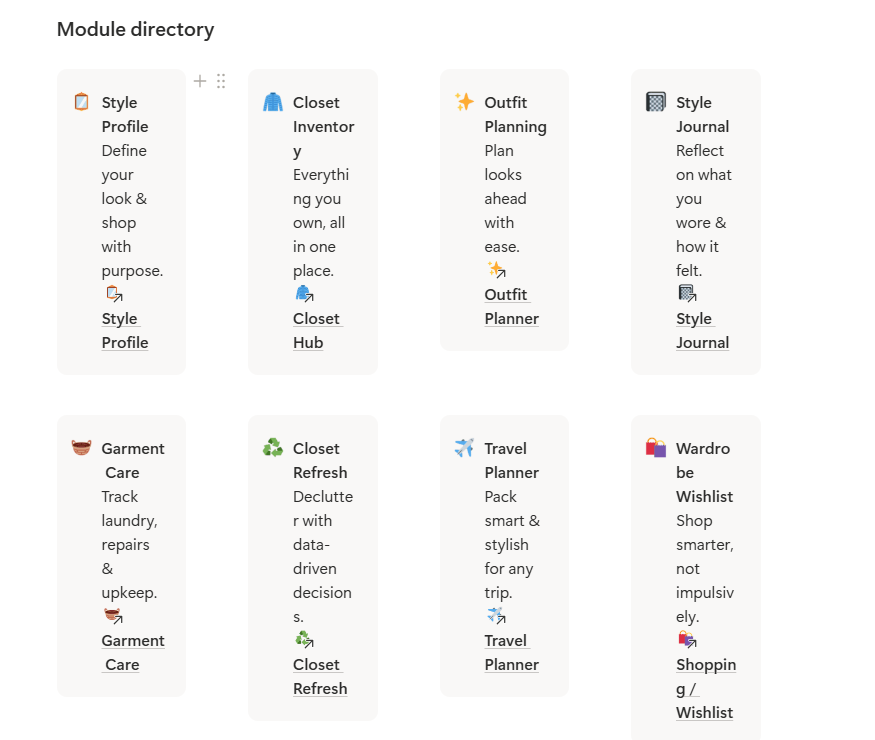
Navigate (synced bar)
What it is?
A brown Navigate callout synced across hub pages so you never hunt for modules. Editing the original updates every page that references it.
When to use?
Anytime you leave Home — Style Profile, Closet Hub, Outfit Planner, Style Journal, Garment Care, Closet Refresh, Travel Planner, Shopping / Wishlist, How to Use.
Step-by-step
- Click any link in the Navigate bar.
- After Duplicate, Favorite the Home page so Navigate is always one click away.
- If you rename a module page, edit the original synced block on Home — do not delete the synced block on child pages.
Tips
- Empty-state tip on Home: Pipeline cards should carry Caption · Hashtags · CTA before you schedule.
- Guides stay one click away: Monthly Planner Hub + nested How to Use.
Common mistakes
- Living only inside full-page databases and forgetting Home — you lose the ritual rhythm.
- Treating every linked view as a different database. Edits sync everywhere.
Style Profile
What it is?
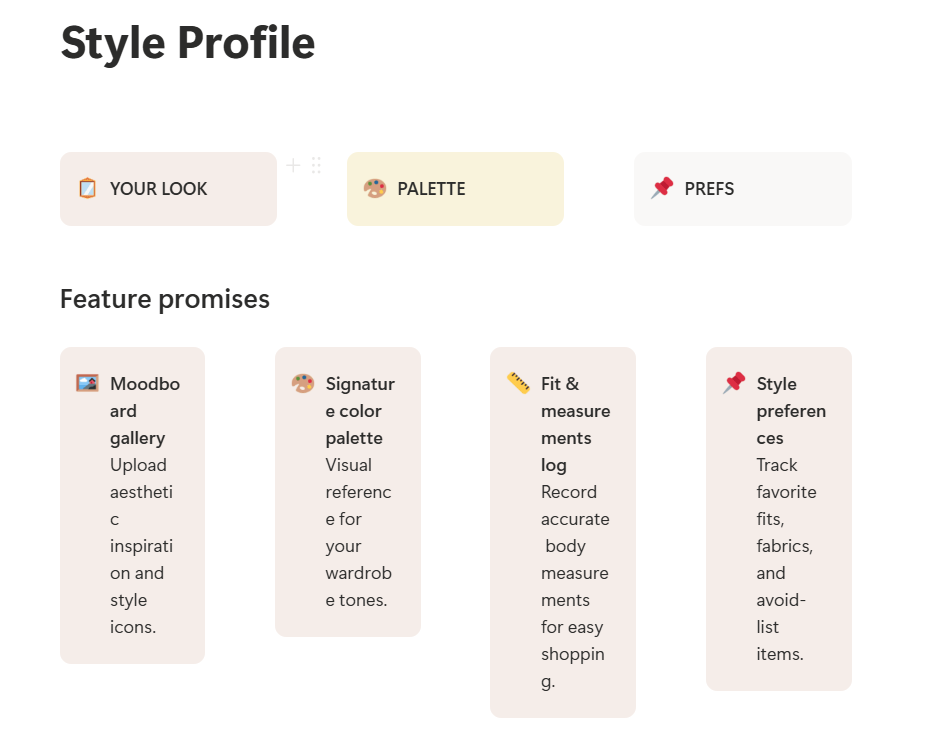
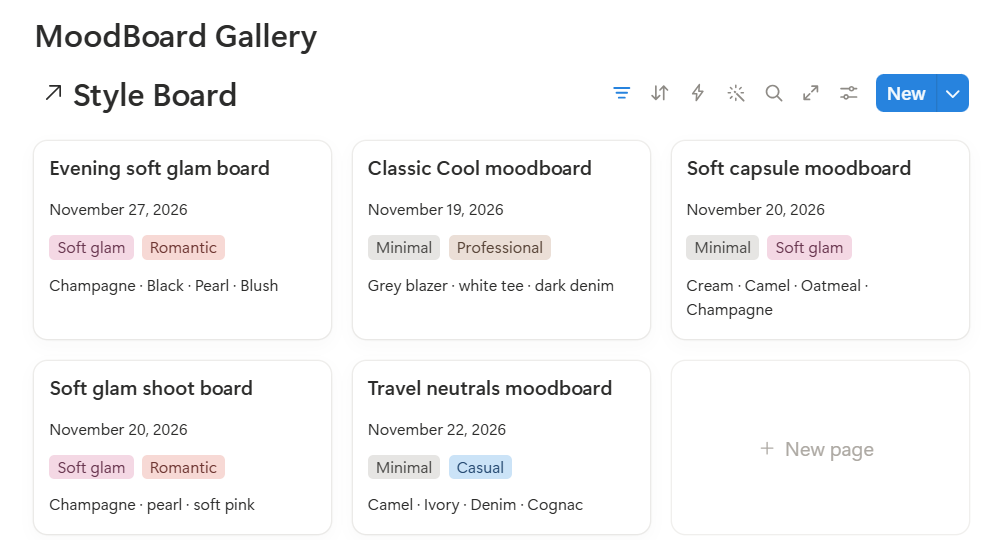
Your north star before shopping or dumping random closet rows. Built on the Style Board database with Types: Moodboard · Palette · Preference · Measurement. Preference cards group by Pref group: Avoid / Brand / Fabric / Style / Fit. Aesthetic tags include Minimal, Romantic, Professional, Casual, Soft glam.
When to use?
Day 0 of setup. Before Wishlist buys. Anytime your feed is louder than your actual closet.
Properties that matter
- Type — Moodboard / Palette / Preference / Measurement
- Pref group — Avoid / Brand / Fabric / Style / Fit (for Preference rows)
- Aesthetic — multi-select style labels
- Colors — free text for palette notes
- Notes — the honest “why I love / avoid this”
Step-by-step
- Open 🪞Style Profile.
- Pin 3–6 Moodboard images (Type = Moodboard) — Home also shows a Style Board strip.
- Add one Palette row with Colors you actually wear (not aspirational pastels you never buy).
- Fill Fit & Measurements (Tops / Bottoms / Dresses / Shoes / Inseam) as Measurement rows — Maya demo sizes are placeholders.
- Add Preference cards under Avoid / Brand / Fabric / Style so Wishlist “Why” stays honest.
MoodBoard Gallery · Signature Color Palette · Fit & Measurements Log · Style Preferences (grouped) · All Style Board rows.
Tips
- Shop against your profile, not against a sale email.
- Soft glam shoot boards and Minimal Cool palettes can live side by side — Maya does.
Common mistakes
- Building a Pinterest of 40 boards and zero Closet Photos.
- Skipping Avoid prefs — then wondering why wishlist keeps collecting “almost.”
Closet Inventory (visual-first)
What it is?
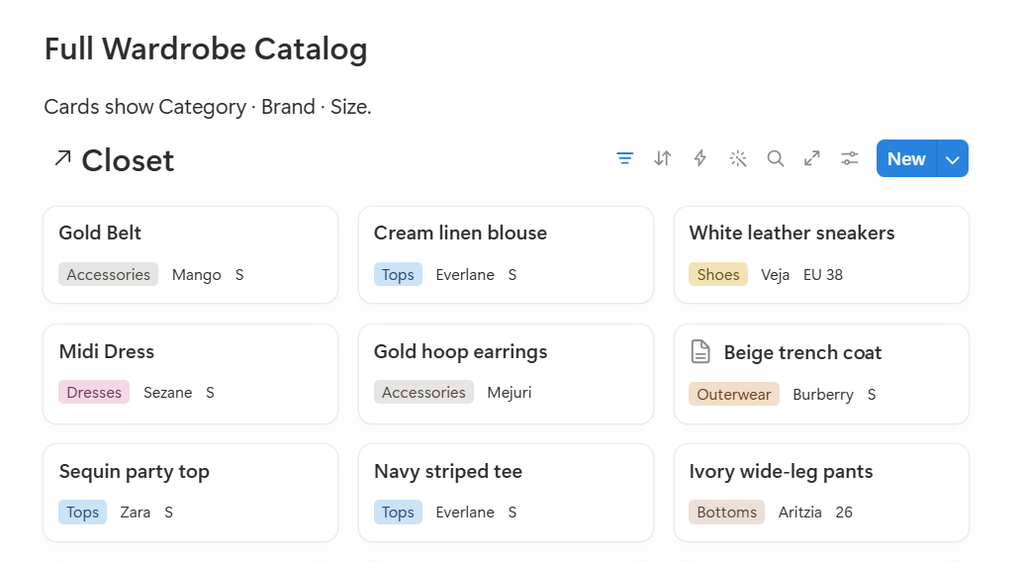
The heart of the system: your visual closet inventory and clothing inventory — a gallery of pieces you own, so you can see exactly what is in your closet. Cards show Photo + Category + CPW + Status — glanceable value, not a data dump. Home strips and Closet Hub views are windows into the same Closet database (your wardrobe tracker).
When to use?
Day 1 after Style Profile. Anytime you bring a new piece home. Laundry days. Seasonal sort.
Properties that matter
Minimal entry (enough for Day 1)
- Name (title)
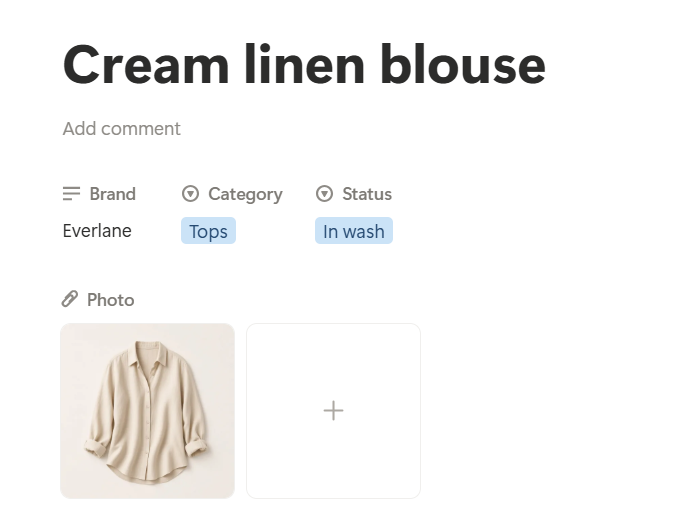
- Photo — Files property; Gallery Card preview = Photo (not page cover)
- Category — Tops / Bottoms / Dresses / Outerwear / Shoes / Bags / Accessories / Sets
- Season — Spring / Summer / Fall / Winter / All-year
- Status — Ready / In wash / Repair / Packed / Archived
Essentials (fill when ready) — Color, Size, Price, Times worn, CPW (formula), Last worn
Style — Style multi-select (Minimal, Casual, Workwear, Soft glam, Street, Romantic, Capsule); Occasion multi-select (Work, Content shoot, Coffee date, Travel, Weekend, Event, Gym); Location (Closet / Drawer / Seasonal box / Travel bag); Favorite
Care & status flags — Owned, In wash (checkbox), Declutter, Donate?, Manual Unworn, Purchase date, Outfits (relation), Notes
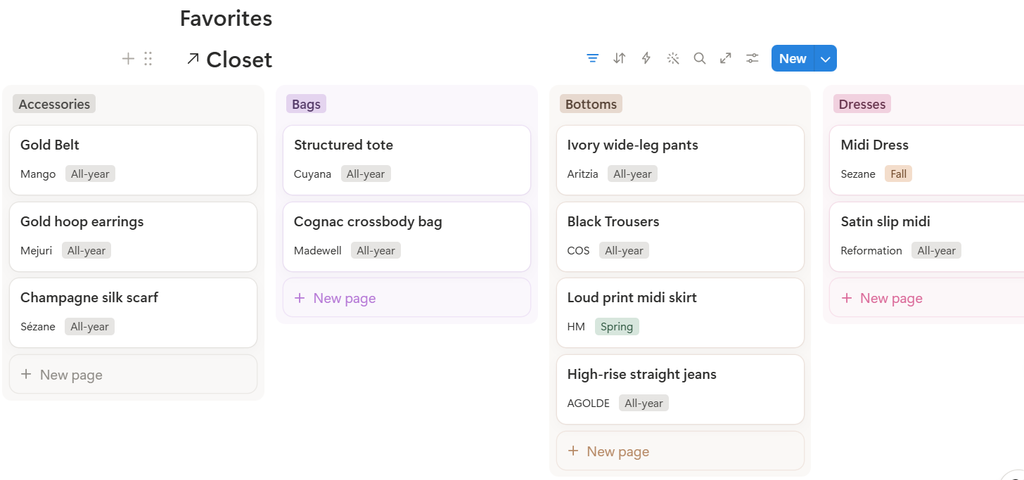
In wash checkbox vs Status
- In wash (checkbox) — fast laundry toggle; powers Home / Closet Hub “In the wash” strips.
- Status = In wash — formal state when you want filters/boards that read Status.
- Best practice: toggle In wash when laundry starts; set Status = In wash if you also use Status-based views. When pieces return: clear the checkbox and set Status = Ready.
- Use Status = Repair / Packed / Archived for non-laundry states (do not rely on the checkbox alone for packing or archive).
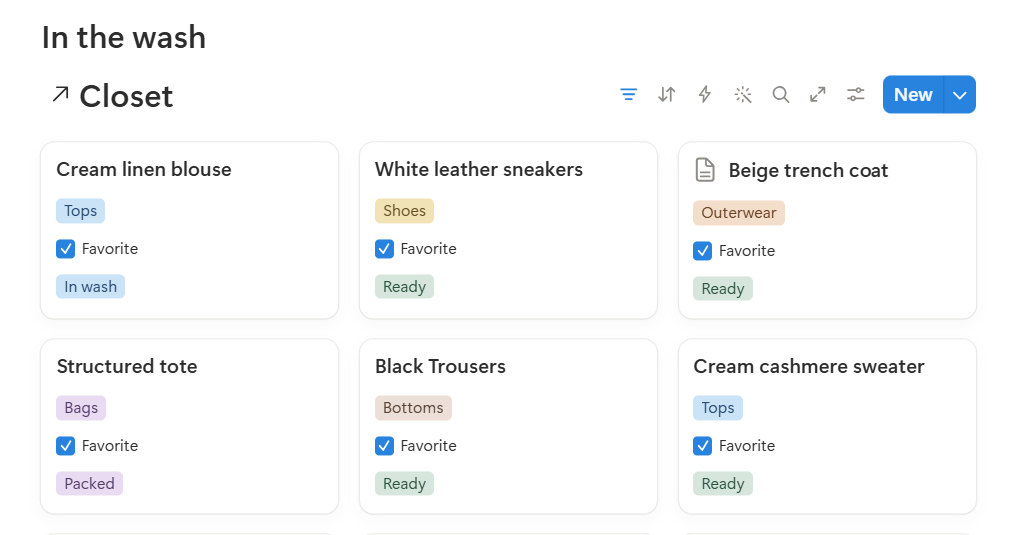
CPW (cost per wear) formula
When Price and Times worn are filled, CPW = Price ÷ Times worn (Closet formula property).
- High CPW + long Last worn = refresh candidate (see Closet Refresh).
- CPW stays empty until both Price and Times worn exist — that is expected, not broken.
- Notion does not auto-bump Times worn from Outfit relations — use the mark-as-worn ritual below.
Step-by-step
- Open 🧥Closet Hub..
- Add pieces you wear (start with 10–20). Upload a clear square or flat-lay into Photo.
- Set Category · Season · Status = Ready. Mark Favorites.
- Optional later: Brand, Color, Size, Price, Style, Occasion, Location.
- Toggle In wash when laundry starts; clear when back on the rail.
- Flag stagnant pieces with Manual Unworn / Donate? / Declutter.
Views (Closet Hub & Home)
| View | Use it for |
|---|---|
| Full Wardrobe Catalog | Master gallery (Category · Brand · Size) |
| Favorites | Most-loved / most-worn pinboard |
| In the wash | Laundry queue |
| By season / By category / By brand | Seasonal sort & shopping memory |
| Recently bought | New arrivals check-in |
| Never worn | Refresh signals |
| Home · Closet cards | Photo + Category + CPW + Status at a glance |
| Home · Declutter queue / Travel packing | Flags and Packed pieces |
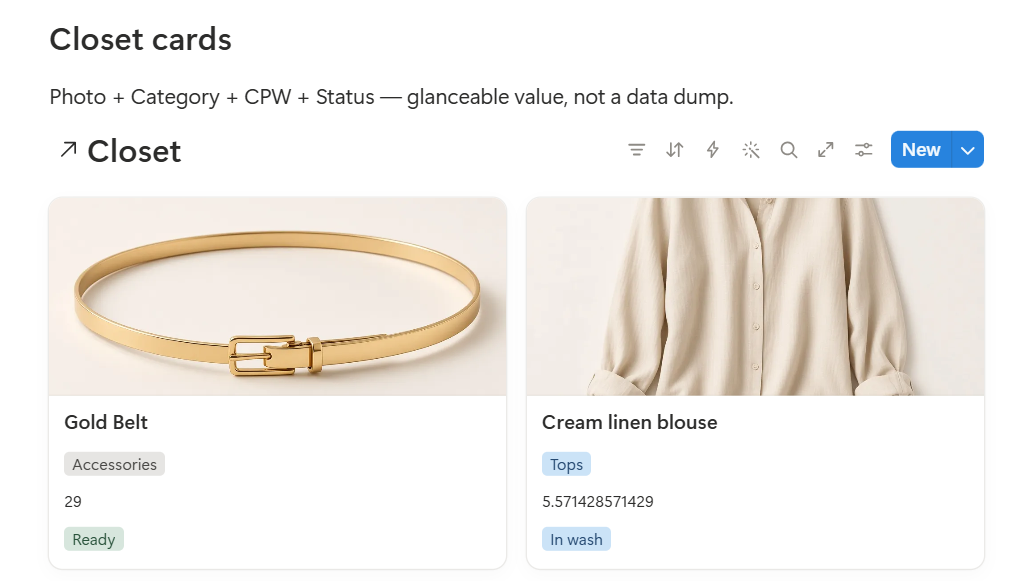
Tips
- Density beats perfection. 10 honest photo cards beat 80 empty spreadsheet rows.
- Prefer gallery views with Card preview = Photo.
- Owned stays checked for pieces still in your life; Archive Status when they leave.
Common mistakes
- Putting the outfit photo only on the page cover — Look/Closet galleries will look empty.
- Expecting CPW without Price or Times worn.
- Using Status = Archived for “in the laundry” — use In wash instead.
Outfit Planner / Look cards
What it is?
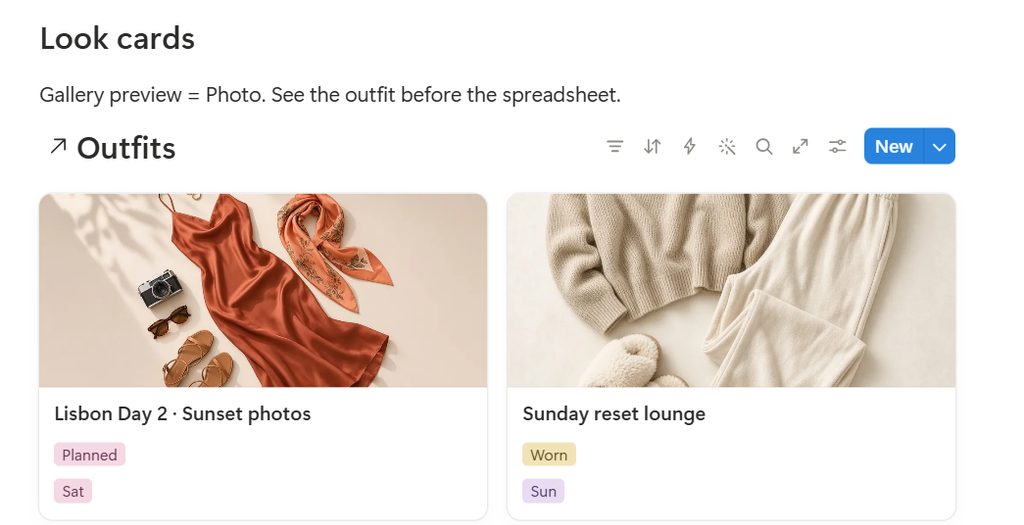
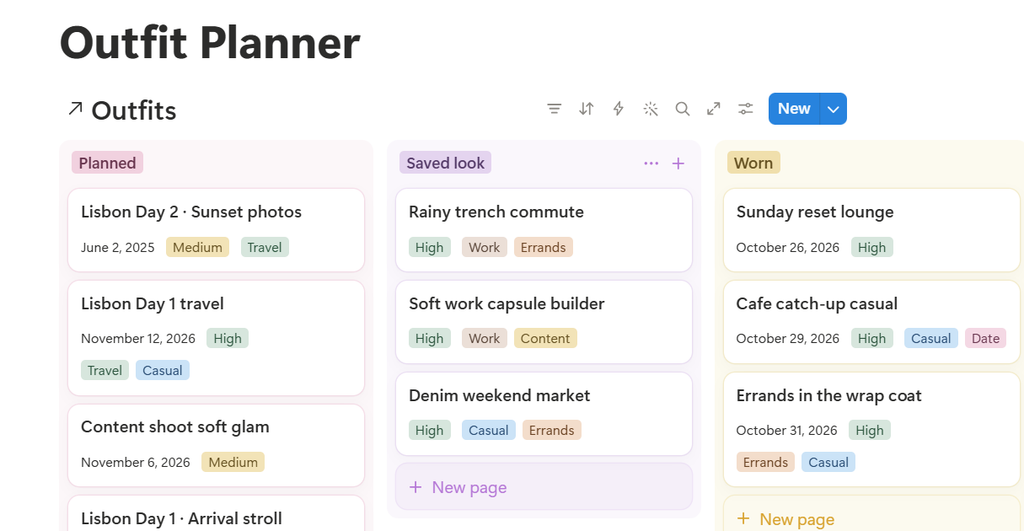
Your wardrobe outfit planner and Notion outfit planner: a weekly scheduler + saved looks as photo cards, so you can track and plan outfits (including trips, interviews, dates, and nights out). Type = Planned / Saved look / Worn. Home “Look cards” gallery preview = Photo. Occasions database supports occasion-based planning beside the weekday board.
When to use?
Sunday plan. Night-before decide. Anytime you want a reusable Saved look (soft work capsule, shoot glam).
Properties that matter
- Name, Photo (Files), Type (Planned / Worn / Saved look)
- Weekday (Mon–Sun) — weekly board groups by Weekday
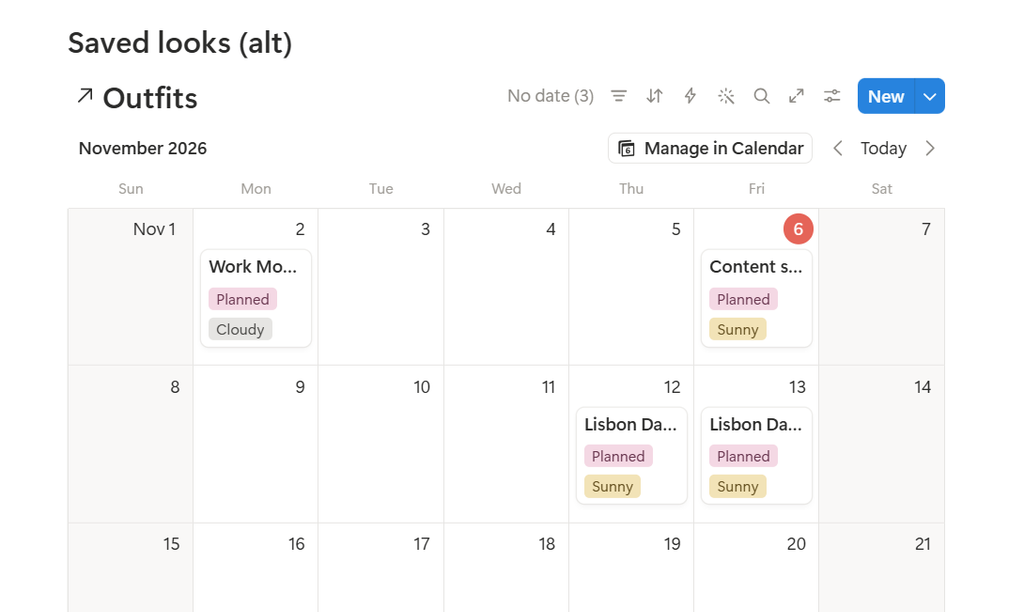
- Date — optional calendar placement
- Items — relation → Closet pieces
- Occasion (relation → Occasions) and/or Occasion tags (Work, Casual, Date, Formal, Errands, Content, Travel)
- Weather (Sunny / Cloudy / Rain / Cold / Hot), Temp (text)
- Comfort (Low / Medium / High), Mood (text), Notes
Step-by-step— plan a week
- Open ✨Outfit Planner.
- Create a look; upload a flat-lay or OOTD into Photo (Gallery Card preview = Photo).
- Link Closet pieces via Items; set Weekday for the week ahead.
- Optional: Occasion tags / Occasion relation; Weather / Temp (jot from your phone — no live widgets).
- Set Type = Planned (or Saved look for reusable capsules).
Step-by-step — mark as worn (CPW loop)
Notion cannot auto-bump wear counts from a relation yet:
- Plan the look and link Items.
- On wear day, set Outfit Type = Worn (+ Comfort / Mood) — this feeds Style Journal.
- Open each linked Closet piece → manually +1 Times worn and update Last worn.
- CPW recalculates automatically when Price ÷ Times worn is valid.
- If laundry starts, toggle Closet In wash.
Views
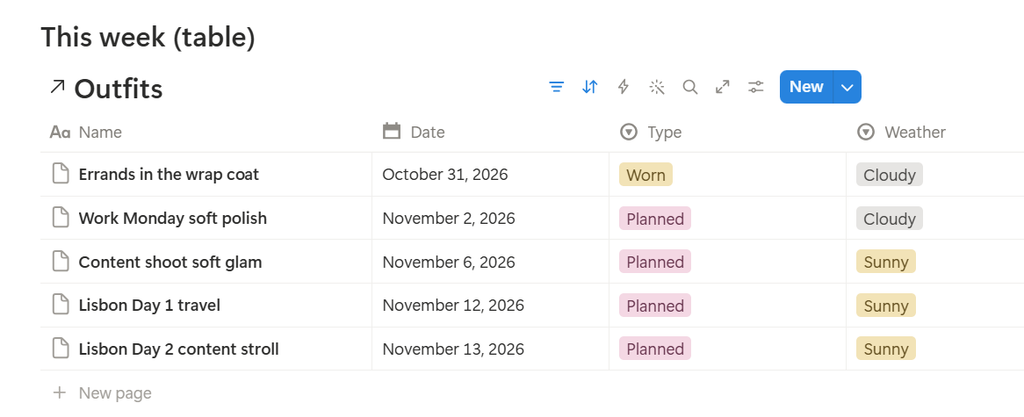
Outfit Builder Library · Weekly Outfit Scheduler (board by Weekday) · Occasions · This week (table) · Month calendar · Planned · Worn · Saved looks.
Tips
- Plan soft work + one shoot look first. Leave gaps on low-energy days.
- High Comfort + happy Mood looks deserve Type = Saved look for repeat weeks.
- Home Look cards and This week outfits are the same Outfits database — not a second system.
Common mistakes
- Planning seven Fully Styled days when laundry capacity is two — trust collapses by Wednesday.
- Marking Worn without bumping Times worn — CPW never learns.
- Skipping Photo on Look cards — the gallery becomes a title list.
Style Journal
What it is?
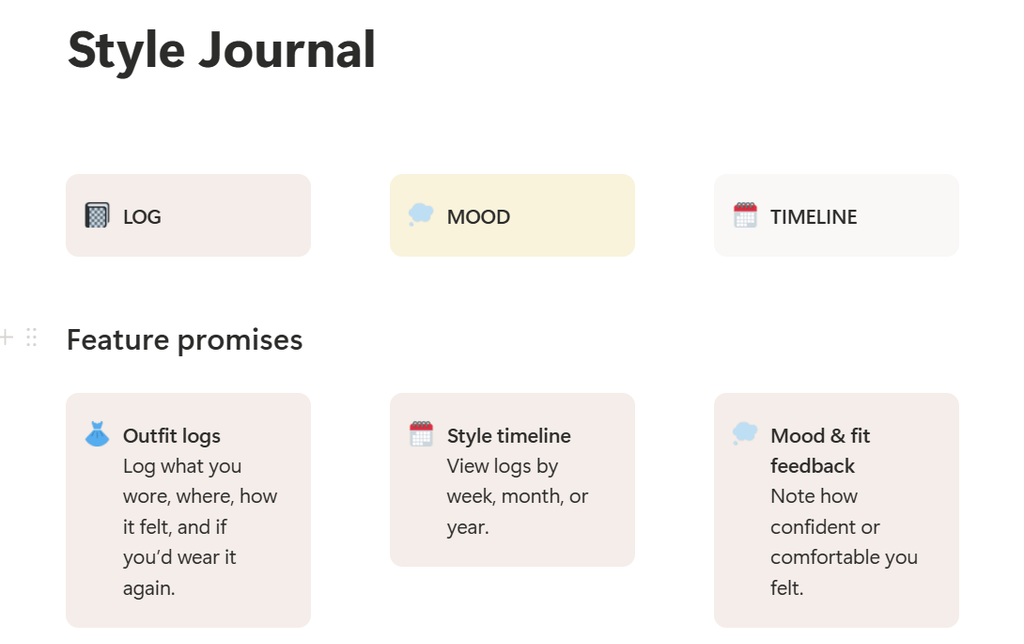
A worn gallery with Comfort / Mood / Occasion — what actually felt good on your body, not what looked good in a cart.
When to use?
After a wear (same day is best). Weekly glance during your soft close. Anytime you feel “I have clothes but nothing works.”
Step-by-step
- Open Style Journal — or filter Outfits where Type = Worn.
- Confirm Comfort + Mood on the outfit row (and Occasion tags if useful).
- Glance weekly for patterns without judgment — Low Comfort repeats are data.
- Promote winners to Type = Saved look for next week’s board.
Tips
- Naming how a look felt is enough. You do not need an essay.
- Content-shoot glam and Soft work capsules can both be “wins” for different days.
Common mistakes
- Skipping Mood because the day was messy — messy days teach the most.
- Keeping every Worn look forever without ever starring a Saved look.
Garment Care
What it is?
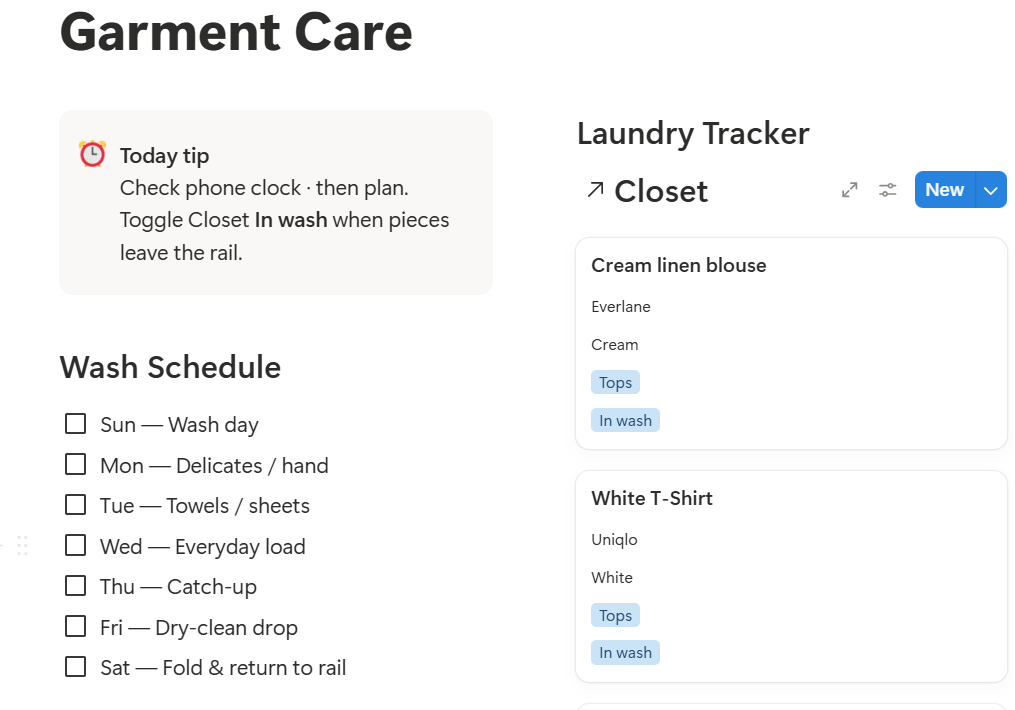
A built-in laundry tracker with wash schedule, plus repair / alteration / special-care log — the garment-care side of this wardrobe manager. Care Log fields: Name, Date, Kind (Laundry / Repair / Alteration / Special care), Wash type (Machine / Hand wash / Dry clean / Delicate), Status (To do / Done), Items (relation → Closet), Notes.
When to use?
Laundry day. When a hem fails. When silk needs Special care notes you will forget otherwise.
Step-by-step
- Open Garment Care.
- On Closet rows, toggle In wash (and/or Status = In wash / Repair).
- Add a Care Log row: Kind + Wash type + link Items + Status = To do.
- When finished → Care Log Status = Done; clear Closet In wash; Status = Ready (or keep Repair until fixed).
- Home “In the wash” strip should empty as pieces return.
Tips
- No live clock or weather embeds — check your phone, then plan.
- Delicate + Dry clean notes belong in Care Log, not only in your head.
Common mistakes
- Leaving In wash checked for weeks — Home strip becomes noise.
- Logging repairs without linking Items — you will not find the story later.
Closet Refresh
What it is?
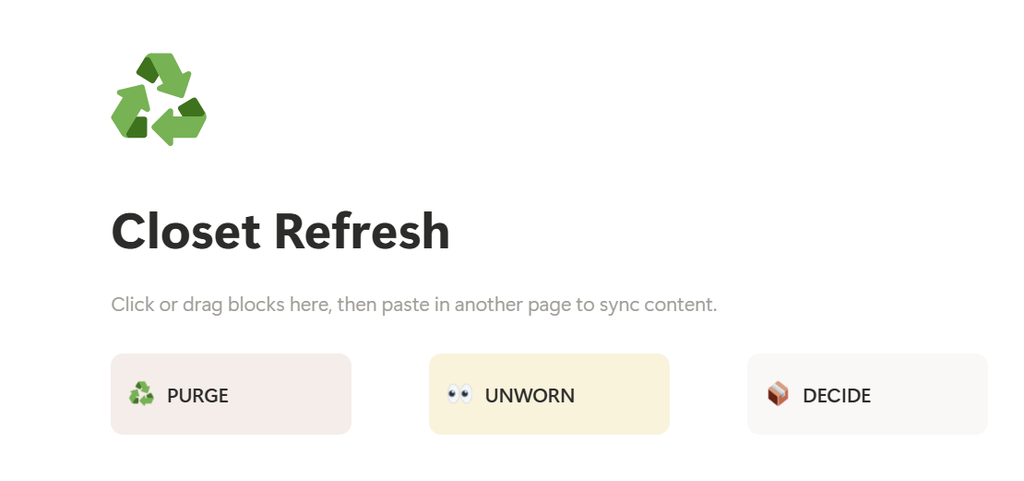
Declutter hub with data-driven kindness: Never worn, Donate?, Declutter flags, and Purge Tasks (Name, Date, Goal, Scope: Tops / Bottoms / Outerwear / Accessories / Workwear / All, Status: Not started / In progress / Done).
When to use?
Season change. After a trip when bags explode. Whenever CPW + Last worn whisper “this piece is expensive guilt.”
Step-by-step
- Open Closet Refresh.
- Review Never worn / Manual Unworn / Donate? / Declutter views (Home also has Never worn + Declutter queue).
- Use CPW + Last worn as signals — high CPW + long idle = candidate, not a moral verdict.
- Create one Purge Task with a kind Goal + Scope + Date.
- Exit, donate, restyle, or Archive — then unflag Donate? / Declutter / Manual Unworn.
Tips
- One small purge task beats a guilt-driven closet overhaul.
- Archived Status keeps history without cluttering Ready galleries.
Common mistakes
- Decluttering everything in one weekend and regretting favorites.
- Ignoring Never worn for a year, then doom-shopping to “fix gaps.”
Travel Planner
What it is?
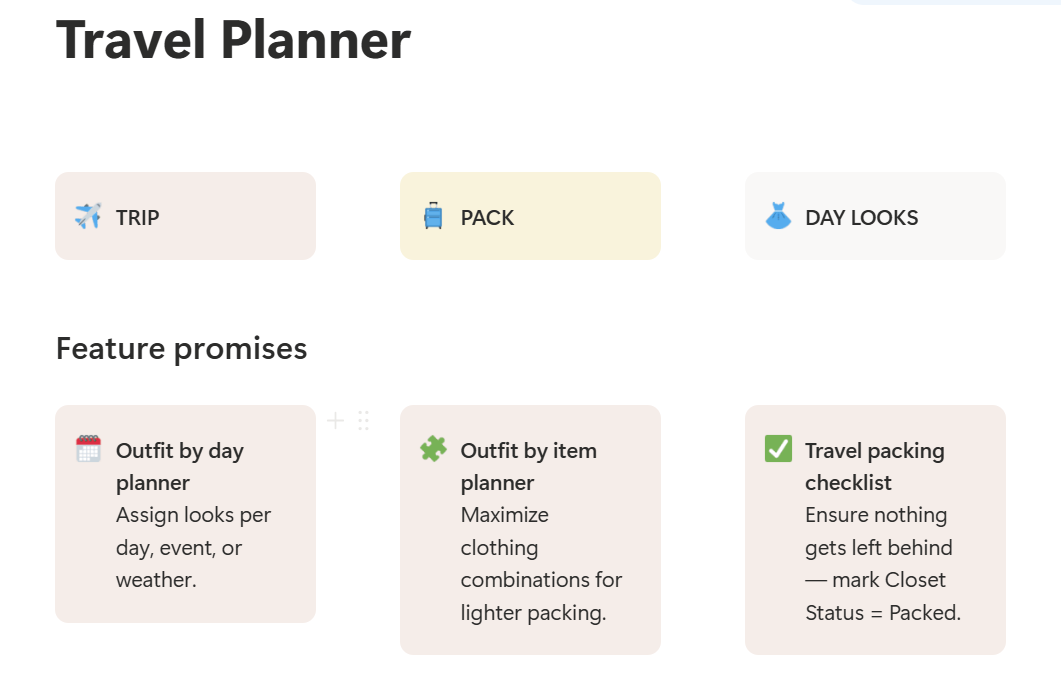
Trips + packing checklist + outfit-by-day. Trips fields: Name, Destination, Start, End, Status (Planning / Packed / Done), Packing notes, Outfits (relation). Closet Status = Packed + Location = Travel bag mark the physical bag.
When to use?
When a trip is calling. Delete pressure to use it every month — open only when needed.
Step-by-step — produce a post
- Open Travel Planner.
- Create a trip: Destination + Start/End + Status = Planning + Packing notes.
- Mark chosen Closet pieces Status = Packed (Location can be Travel bag). Home “Travel packing” strip lights up.
- Link day Outfits (Weekday / Date) for the itinerary; Type can stay Planned until worn on the trip.
- After the trip: Trip Status = Done; Closet Status back to Ready; clear Packed / Travel bag; bump Times worn for looks you actually wore.
Tips
- Explore Maya’s Lisbon demo trip (Day 1 stroll / Day 2 sunset), then replace with yours.
- Packing notes that restore your nervous system beat packing notes that only impress the grid.
Common mistakes
- Packing half the closet “just in case” — Packed Status loses meaning.
- Forgetting to un-Pack after homecoming — Ready galleries look emptier than they are.
Shopping / Wishlist
What it is?
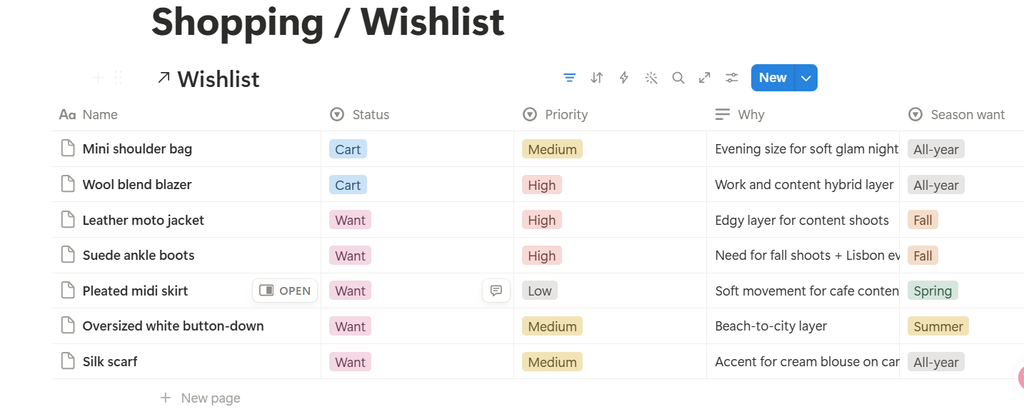
An intentional clothing wishlist — wants kept separate from your owned closet inventory. Wishlist fields: Name, Brand, Category, Season want, Priority (High / Medium / Low), Status (Want / Cart / Bought), Budget, Why, Link, Worth it?, Closet item (relation), Notes.
When to use?
Before checkout. During sales when your cart is loud. Monthly against Style Profile.
Step-by-step
- Open Shopping / Wishlist.
- Capture wants with Why + Season want + Priority + Budget (Status = Want).
- Move to Cart only when Style Profile still agrees.
- When Bought → Status = Bought, tick Worth it?, create/link the Closet row via Closet item, add Photo + Price on Closet.
- Review Current wishlist on Home monthly — delete quiet wants without guilt.
Tips
- If it fails Style Profile palette or Avoid prefs, leave it on the list longer.
- Worth it? is a future-you gift — fill it two wears in, not at the unboxing high.
Common mistakes
- Dumping every “maybe” as High priority — Priority High is rare.
- Buying without creating a Closet row — inventory and CPW never see the purchase.
Hub “At a glance” views — how to read them
On the main hub you will see linked views. They are windows into the same databases — not separate systems.
| View | Use it for |
|---|---|
| Look cards | Outfit gallery — Photo preview first |
| Closet cards | Photo + Category + CPW + Status |
| This week outfits | Weekday plan at a glance |
| Recent buys | New Closet arrivals |
| Full wardrobe tease · By category | Category skim without opening Closet Hub |
| In the wash | Laundry queue (In wash / Status) |
| Never worn / unworn | Refresh signals · CPW tip nearby |
| Current wishlist | Intentional wants |
| Travel packing | Packed pieces for the active trip |
| Style Board | Moodboard / palette tease |
| Declutter queue | Donate? / Declutter flags |
Formulas deep dive — CPW
CPW is a Closet formula: roughly Price ÷ Times worn when both inputs exist. It is read-only — you edit Price and Times worn; CPW follows.
How to keep it honest
- Enter Price when the piece arrives (or your best memory of it).
- After each wear, +1 Times worn and set Last worn (Outfit mark-as-worn ritual).
- Read CPW on Closet cards and Never worn strips — high CPW is a question, not a scolding.
- After a successful wear season, CPW should fall — that is the point of a loved piece.
Common mistakes
- Entering Price in Notes instead of the Price property — formula cannot see it.
- Expecting Outfit Items relations to increment Times worn automatically.
Layout tip — Photo vs cover
Prefer gallery views with Card preview = Photo (the Files property on Closet and Outfits).
- Page cover is decorative only and does not drive Closet / Look card previews.
- On item pages, Photo is pinned as a square property for a boutique feel.
- Advanced properties stay optional — empty Brand fields are fine if Photo is strong.
Demo story · Maya
Demo persona Maya keeps a soft capsule for everyday + a few content-shoot pieces. Sample data includes:
- Style Profile — Soft glam shoot board + Minimal Cool palette + measurement placeholders
- Look cards — Work Monday soft polish, Lisbon Day 1 arrival stroll, Lisbon Day 2 content / sunset
- Closet cards with Category · CPW · Status
- Laundry queue, wishlist items, purge tasks, Lisbon trip packing
Replace her rows with yours anytime — keep any looks that still teach the Photo → Plan → Worn → CPW loop.
Ritual cheat-sheet
Daily / wear day
- Home glance → wear Planned look → Type = Worn + Comfort/Mood → +1 Times worn + Last worn → In wash if needed
Weekly
- Plan Weekday board · clear laundry strip · Style Journal glance · optional Wishlist prune
Seasonal
- Closet Refresh Purge Task · Season filters · Travel pack/unpack · revisit Style Profile palette
License
Digital Closet OS 2027 — Wardrobe & Outfit Planner is an independent English wardrobe OS with original demo data. Not affiliated with any third-party sample.
Personal-use license: Use this template for your own personal or business organization. Do not resell, redistribute, or share it as a product.
You’re ready?
You do not have to use every module. Start with Style Profile + Closet Hub, live in Home Look/Closet cards, plan one week in Outfit Planner, close wears with Comfort/Mood, and prune with Closet Refresh. Care, Travel, and Wishlist stay optional until you need them.
Plan OOTDs. Know what you own. Shop with intention. Welcome to your 2027 wardrobe home.
Get the Notion template — $9.90
One-time payment. After checkout, open Digital Closet OS and duplicate it into your workspace.
Buy Template — $9.90